Print-Ready Artwork Checklist for Kenya: PDF Setup, Bleed, CMYK, Fonts & 300 DPI Before You Print
Introduction
You can have a beautiful design, a strong brand message and the right printing product, but if the artwork file is not prepared correctly, the final print may still come out with mistakes. Common issues include cut-off text, blurry images, wrong colours, missing fonts, poor alignment, white edges around the design or files that cannot open properly.
That is why print-ready artwork matters.
Whether you are printing business cards, flyers, brochures, stickers, labels, roll-up banners, menus, posters, booklets, packaging boxes, branded stationery or event materials, the quality of your print starts with the quality of your file. A print-ready file helps the printer produce your work faster, cleaner and with fewer corrections.
This guide explains how to prepare artwork for printing in Kenya, including PDF setup, bleed, CMYK colour, font handling, image resolution, margins and final file checks.
What Does Print-Ready Artwork Mean?
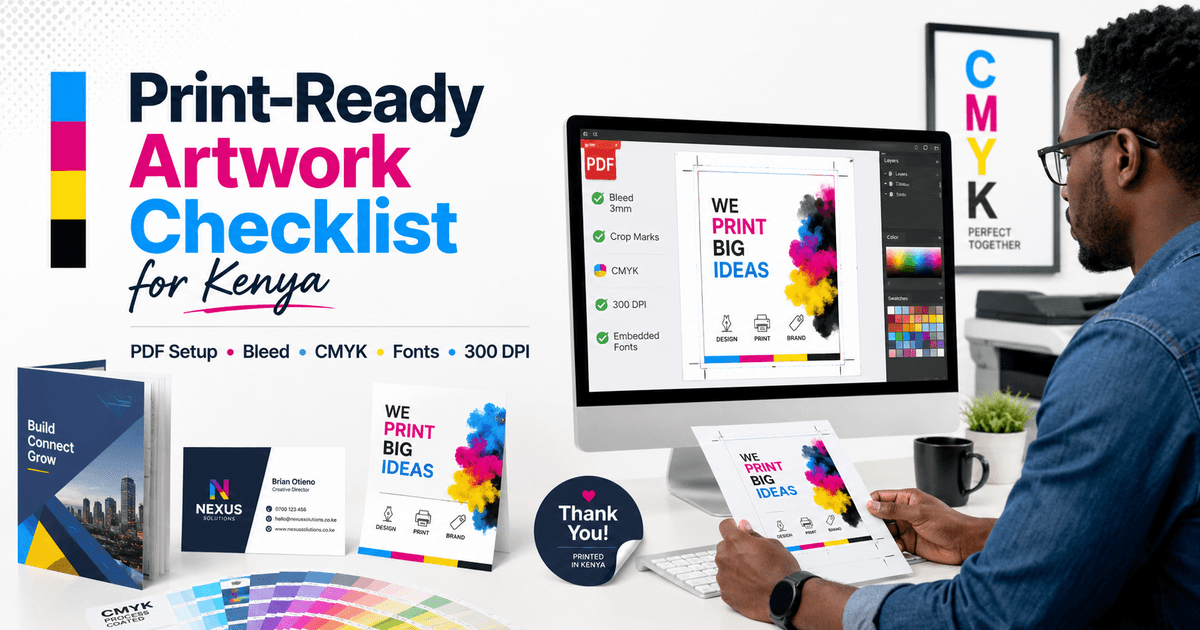
Print-ready artwork is a design file that is prepared correctly for professional printing. It means the file has the right size, correct colours, high-resolution images, safe margins, bleed, embedded fonts and the proper export format.
In simple terms, a print-ready file should be ready for production without the printer needing to redesign, resize or repair major parts of the artwork.
A good print-ready file should answer these questions:
Is the document size correct?
Is there enough bleed for trimming?
Are the colours set for printing?
Are the images clear enough?
Are the fonts embedded or converted?
Is important text away from the cutting edge?
Is the file saved in a format the printer can use?
If the answer is yes, your artwork is much easier to print correctly.
Why Print-Ready Files Are Important
A print-ready file saves time, reduces mistakes and helps your printed materials look professional. Many print delays happen because the artwork file is not ready for production.
For example, a flyer may look fine on a phone screen, but when printed, the image may appear blurry because it was downloaded from WhatsApp or social media. A business card may look perfect on a laptop, but after trimming, the phone number may be too close to the edge. A sticker label may have the correct design, but the file may not include bleed, causing white edges after cutting.
Preparing your file properly helps avoid these problems before printing begins.
1. Use the Correct Document Size
Before designing, confirm the final print size. Do not design randomly and expect the printer to resize everything later.
For example:
Business cards should be designed using the exact business card size.
A5 flyers should be set up as A5 from the beginning.
Roll-up banners should be designed in the correct banner size.
Product labels should match the actual bottle, jar, pouch or packaging size.
Booklets should have the correct page size and page count.
When the size is wrong, resizing can distort the artwork, stretch images, move text or affect the layout. Always start with the final size your printed item should be.
2. Add Bleed to Your Artwork
Bleed is the extra design area that extends beyond the final cutting line. It helps prevent white edges after trimming.
When printed materials are cut, the blade may shift slightly. Without bleed, even a small cutting movement can leave a white border around the design. This is common with business cards, flyers, posters, stickers, labels and packaging artwork.
A safe standard is to add 3mm bleed on all sides for most small and medium print items. Large-format prints may require different setup depending on the product.
For example, if your flyer background is yellow, the yellow background should extend beyond the final trim edge. Do not stop the background exactly at the edge.
3. Keep Important Text Inside the Safe Margin
The safe margin is the area inside the trim line where important text, logos and contact details should stay. This protects important content from being cut off.
Keep phone numbers, email addresses, QR codes, logos, prices, product names and social media handles away from the edge. Even when bleed is added, text should not sit too close to the cutting line.
This is especially important for:
Business cards
Flyers
Stickers
Product labels
Menu cards
Event tickets
Gift vouchers
Packaging sleeves
A design can have background colours and images going into the bleed area, but important information should stay safely inside.
4. Use CMYK Colour Mode for Printing
Most screens use RGB colour, while professional printing normally uses CMYK. RGB colours are made for digital screens, while CMYK colours are made for ink and print production.
A colour that looks bright on your phone or computer may print slightly differently if the file is created in RGB. Neon greens, bright blues and very intense colours are common examples of colours that may shift when printed.
For better print results, prepare your artwork in CMYK colour mode before exporting the final file. This gives you a more realistic idea of how colours will appear in print.
If your brand has specific colours, provide the correct colour values or brand guide where possible.
5. Use High-Resolution Images
Low-quality images are one of the biggest causes of poor print results. An image may look sharp on a phone screen but appear pixelated when printed.
For most printed materials, images should be at least 300 DPI at the final print size. This is especially important for business cards, flyers, brochures, menus, labels, stickers, catalogues, booklets and packaging.
For large-format items like banners and signage, the required resolution may depend on viewing distance. A billboard viewed from far away does not need the same image resolution as a business card viewed closely. However, the image still needs to be clean, clear and not overly compressed.
Avoid using:
Screenshots
WhatsApp-compressed images
Images downloaded from social media
Small logos copied from websites
Blurry product photos
Pixelated PNG or JPG files
For logos, vector files are best because they can be resized without losing quality.
6. Use PDF as the Final Print File
PDF is usually the safest format for sending print-ready artwork because it preserves layout, fonts, images and page structure better than many editable formats.
A proper PDF helps prevent issues such as missing fonts, moved text, broken layouts or unsupported design elements.
When exporting your PDF, choose high-quality print settings. Do not export using settings meant for email, web sharing or small file size only. Those settings may reduce image quality.
A good print PDF should include:
Correct page size
Bleed
High-resolution images
Embedded fonts
CMYK colours where possible
Clean layout
No unwanted crop marks unless requested
No hidden elements outside the artwork area
7. Embed or Convert Fonts
Fonts can change when a file is opened on another computer that does not have the same font installed. This can cause text to move, change style or break the design.
To avoid this, embed fonts when exporting the PDF. Another option is to convert text to outlines, especially for logos, headings and special typography.
This is important for:
Business cards
Certificates
Menus
Wedding cards
Product labels
Corporate stationery
Packaging artwork
Event materials
Before converting text to outlines, keep an editable copy of the original file in case you need to make changes later.
8. Check Spelling, Contacts and Details Carefully
Printers may check file quality, but they may not know whether your phone number, price, name, date, address or QR code is correct. Always proofread before sending artwork for printing.
Check:
Phone numbers
Email addresses
Website links
M-Pesa till or paybill numbers
Social media handles
Product names
Event dates
Venue names
Prices and offers
Spelling and grammar
QR code destination
Logo placement
A small typo can be expensive if the job has already been printed.
9. Make Sure QR Codes Are Clear and Scannable
QR codes are now common on menus, flyers, posters, business cards, packaging and event materials. But they must be large enough and clear enough to scan.
Before printing, test the QR code using a phone. Scan it from the final PDF, not only from the design software. Make sure it opens the correct page, form, WhatsApp chat, menu or payment link.
Avoid placing QR codes too close to the edge, over busy backgrounds or in very low contrast colours.
10. Flatten Transparent Effects Where Needed
Some designs use shadows, gradients, transparent images, overlays and blending effects. These can sometimes print differently if the file is not exported properly.
If your artwork has complex effects, export a high-quality PDF and review it carefully before sending. Make sure shadows, overlays and transparent objects look correct.
For safety, avoid unnecessary effects in important areas such as text, logos, barcodes and QR codes.
11. Avoid Very Thin Lines and Tiny Text
Very thin lines may disappear during printing, especially on small items. Tiny text can also become hard to read.
For business cards, labels, stickers and packaging, make sure the text is readable at actual size. Do not judge the design while zoomed in on your computer. View it at 100% size or print a sample on a normal printer for checking.
Important information should be clear and easy to read.
12. Use the Right File Format for Logos
If your artwork includes a logo, use the best available logo file. A low-quality logo can make the entire design look unprofessional.
Best logo file formats for printing include:
AI
EPS
SVG
PDF
High-resolution transparent PNG
Avoid using logos copied from websites, screenshots or social media profile pictures. These are usually too small for clean printing.
For signage, banners, uniforms, stickers and large-format branding, vector logos are highly recommended.
13. Prepare Booklets and Multi-Page Documents Correctly
Booklets, catalogues, company profiles, magazines, funeral programs and reports require extra care because they have multiple pages.
Before sending booklet artwork, check:
Page size
Page order
Number of pages
Margins
Bleed
Cover design
Inner pages
Page numbers
Binding side
Image quality
Consistent fonts
Consistent spacing
Send the document as single pages unless the printer specifically asks for spreads. This makes imposition and production easier.
14. Check Product Labels Against the Actual Container
For label stickers, the artwork should match the actual container size and shape. A label for a round bottle is not the same as a label for a flat pouch, jar, tin or box.
Before printing labels, confirm:
Label width
Label height
Bottle or container size
Front label and back label details
Ingredients
Barcode
Batch number area
Expiry date area
Contact details
Legal or product information
Waterproof or indoor use requirements
If the product will be exposed to water, oil, refrigeration or outdoor conditions, choose a suitable label material.
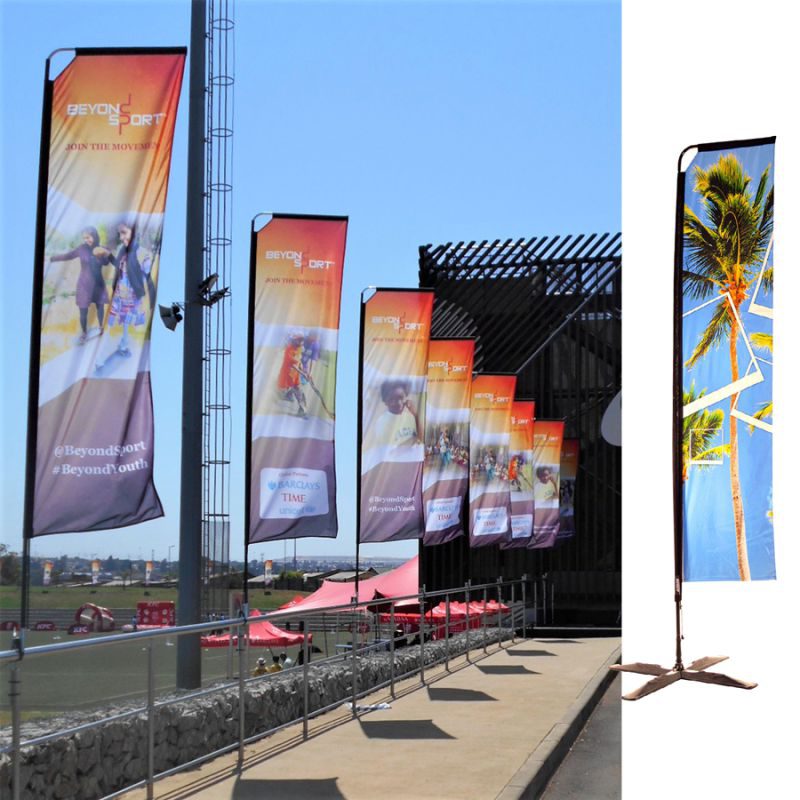
15. Check Large-Format Artwork at the Right Scale
Large-format printing includes banners, backdrops, posters, flags, wall branding, vehicle branding and signage. These files are often large, so they may be designed at full size or at a smaller scale such as 50% or 25%.
If you design at a smaller scale, clearly tell the printer the scale used. For example, if a banner is designed at 50% size, the printer must know it should be enlarged during production.
For large-format artwork, check:
Final size
Scale
Image quality
Logo quality
Text size
Viewing distance
Bleed or finishing allowance
Eyelet or hemming area
Safe area for important text
Do not place key information too close to edges, especially on banners that will be hemmed, mounted or framed.
16. Name Your Files Clearly
Clear file names help avoid confusion, especially when sending several versions of artwork.
Instead of naming files like:
final.pdfnew-final-final2.pdfprint this one.pdf
Use clear names like:
ABC-Company-A5-Flyer-Print-Ready.pdfBeauty-Brand-Product-Label-60x90mm.pdfEvent-Rollup-Banner-850x2000mm.pdf
Good file names make it easier to identify the correct file for printing.
17. Send Editable Files Only When Needed
For most print jobs, a print-ready PDF is enough. But if the artwork needs editing, resizing, correction or design assistance, you may need to send editable files.
Editable files may include:
Adobe Illustrator files
Photoshop files
InDesign files
CorelDRAW files
Canva links
Packaged design folders
Font files where allowed
Linked images
When sending editable files, make sure all images and assets are included. Otherwise, the file may open with missing links.
Common Artwork Mistakes to Avoid
Here are common mistakes that delay printing or reduce final quality:
Sending screenshots instead of original files
Designing without bleed
Placing text too close to the edge
Using RGB colours only
Sending blurry images
Using low-quality logos
Forgetting to embed fonts
Sending the wrong size
Sending the wrong version
Forgetting to proofread
Using tiny text
Not testing QR codes
Sending compressed WhatsApp images
Exporting PDFs in low quality
Avoiding these mistakes can save time, money and stress.
Print-Ready Artwork Checklist Before Sending Your File
Before sending your artwork for printing, confirm the following:
The file is the correct size.
Bleed has been added where needed.
Important text is inside the safe margin.
Colours are prepared for printing.
Images are high resolution.
Logos are sharp and clean.
Fonts are embedded or outlined.
Spelling and contact details are correct.
QR codes have been tested.
The file is exported as a high-quality PDF.
The file name is clear.
You have checked the final design at actual size.
You have sent the correct final version.
Best File Format to Send for Printing
The best general format for printing is a high-quality PDF. However, depending on the job, the printer may also accept AI, PSD, EPS, SVG, PNG or JPG.
Use PDF for most final print files. Use editable files when the design needs adjustments. Use vector files for logos, signage, large-format branding and cutting work.
Frequently Asked Questions
What is the best file format for printing in Kenya?
A high-quality PDF is usually the best format for printing because it keeps the layout, fonts, images and design structure stable. For logos and large-format work, vector files such as AI, EPS, SVG or PDF are also recommended.
What is bleed in printing?
Bleed is the extra design area that extends beyond the final trim size. It prevents white edges after cutting. For many print items, 3mm bleed on each side is a good standard.
Should I design in RGB or CMYK?
For printing, CMYK is preferred because it is made for print production. RGB is made for screens, so some colours may look different when printed.
Why do printed images look blurry?
Printed images often look blurry because the original file is low resolution, compressed, copied from social media or downloaded in a small size. Use high-resolution images, ideally 300 DPI for most close-view printed materials.
Can I send a Canva design for printing?
Yes, but export it correctly. Download the design as a high-quality PDF for print, include bleed where needed and check that images, text and colours look correct before sending.
Do I need crop marks?
Not always. Some printers prefer files without crop marks, while others may request them. The most important thing is to include the correct artwork size and bleed. Ask your printer before adding crop marks.
Can WhatsApp images be used for printing?
WhatsApp often compresses images, which can reduce quality. For professional printing, send the original image or design file instead of a compressed version.
Conclusion
Preparing print-ready artwork is one of the best ways to get clean, professional and accurate printed materials. A well-prepared file helps prevent delays, poor colour output, blurry images, cut-off text and production mistakes.
Before sending your artwork for printing, check the size, bleed, colour mode, image quality, fonts, margins, QR codes and final PDF export. Whether you are printing business cards, flyers, labels, banners, stickers, booklets, packaging or signage, a proper print-ready file gives your project a better final result.
If you are not sure whether your file is ready, send it for artwork checking before production. It is better to correct a file before printing than to discover mistakes after the job is already printed.